Article source at motorhome.com

Brake Time
By Ben Smith
December 23, 2014
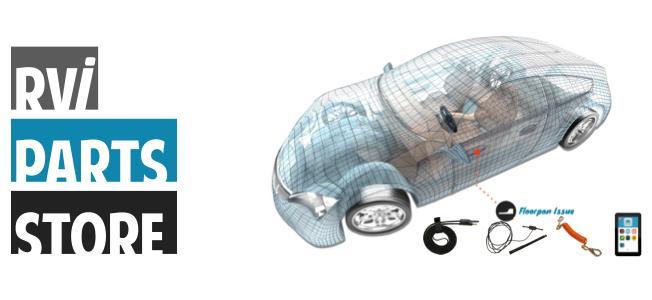
(photo credit: Chris Hemer) Installing the RVibrake2 auxiliary braking system, with a tire-pressure-monitoring feature, nets shorter stopping distances and greater confidence
There are a great number of RVers who want to take the comforts of home with them when they travel in a motorhome. Of course, these include things like a comfortable bed, shower, TV, etc., but for many, “comfort” also means having a car available to reach beyond the campsite when you arrive at the destination.
Renting a car at your destination is a solution, but rental cars are not always available because of location and/or distance from a rental source. Using a towing dolly is an option, but that means finding a place to park the dolly, either at home or at a campground. And, getting the car on the dolly, and tied down, can require quite a bit of effort.

The most often used solution is to hook the family car to the motorhome and flat tow it. There are many excellent products available that allow you to do this — towbars come in many sizes and shapes, and have a variety of features. Once the towed vehicle is connected to the coach, however, a new issue arises. By adding the additional weight of a towed vehicle to the already heavy weight of the motorhome, the stopping distance and even the normal slowing distance of the combo increases significantly.
In order to provide additional braking, an auxiliary braking system can be installed in the towed vehicle. It’s quite a relief when a situation requires you to use the brakes in your motorhome — either in normal braking or in full-on emergency braking — and you sense you are not being pushed by the towed vehicle, but are indeed getting additional braking from it. And, if the towbar failed and the towed vehicle were to break away, it would be extremely important to have the vehicle’s brakes applied immediately to bring it to a stop.
 In most states, the primary need for an auxiliary braking system is to meet the requirements of the state vehicle safety code. These states, and provinces in Canada, require an auxiliary braking system be installed in the towed vehicle. Indeed, having an auxiliary braking system in the towed vehicle is almost as necessary for safety as is having a towbar just to move the vehicle along behind the coach.
There are a number of braking systems on the market; some are portable and others can be permanently mounted in the dinghy vehicle. Portable units are very popular for obvious reasons, but some are quite bulky and heavy, and occupy valuable storage space. The RVibrake2 auxiliary braking system is svelte and proportional (inertia-activated) to boot. Installation is relatively easy and once we got the motorhome and dinghy on the road, it was clear that this braking device is a top performer.
If packaging represents the quality of the product inside and the corporate mindset of the company that makes it, RVi has nailed it. The product inside was not oversold by the packaging nor the advertising hype.
The basic brake actuator is not much larger than an older laptop computer and has a handle on the side that makes it easy to carry and install in the vehicle. There are various bits and parts in the box and they begin to make sense once the installation begins. Installation of the breakaway switch and  wiring (included with the system) from the vehicle’s front bumper through the firewall is the most difficult and time-consuming step. Once the breakaway switch and wiring is in place, however, the rest of the installation is pretty straightforward.
The RVi actuator sits on the vehicle floor directly in front of the driver’s seat and the actuator arm is attached to the brake pedal with a set of claw-like grips that are very easy to use. Through some clever engineering, the rear of the actuator arm is positioned at any of the several anchor points to adjust for the variations in floor and pedal configurations between various cars. Having the ability to move the actuator arm also makes placement and detachment of the claws from the brake pedal a very easy process. In some cases, a bar that is included with the unit can be attached to the driver’s seat support at floor level to provide a rear stop for the actuator if necessary. In the Jeep Liberty used for the test, the floor pan had a slight rise of 2 inches that provided a rear stop so the bar was not required.
There is a wire antenna that plugs into the actuator and it is draped over the vehicle’s rearview mirror to provide the communications link to the monitor that goes in the motorhome. Then, the power cord is plugged into the vehicle’s 12-volt DC outlet and the lanyard between the motorhome and the
 breakaway switch is connected. At this point, the red lights on the actuator will begin to flash and the compressor, which provides air pressure for the ram mechanism, may or may not come on.
The next step is to push the Auto Position button three times, waiting for the actuator to press the brake pedal and retract between each time the Auto Position button is pressed. It is very important that the button be pressed three times to automatically position the actuator and to relieve any vacuum stored in the dinghy’s vacuum braking reservoir. This process is required each time you hook the dinghy to the motorhome and install the RVibrake2.

Installation Tip: Moving the adjustable actuator arm on the RVibrake2 not only provides for the optimal angle on the brake pedal, but also makes it easier to remove the spring-loaded jaw.
Should the vehicle engine be started any time after this point, the 12-volt DC connection must be unplugged; then wait for a brief period and plug it back in to reset the actuator. As before, the Auto Position button must be pushed three times to relieve the vacuum assist. There is a very strong warning from the manufacturer that failing to relieve the vacuum assist will most likely result in some degree of tire damage and/or adverse brake wear due to overbraking.
Once the installation of the RVibrake2 actuator is complete, the wireless monitor can be plugged in to any 12-volt DC outlet in the motorhome dash and in a position that is obviously viewable from the driver’s seat. The wireless monitor has a very descriptive menu that is easy to follow. Because the RVibrake2 system is a Bluetooth device, the monitor must be paired (initially only) to the actuator in the dinghy. Following the steps in the Menu instructions completes this task.
Once the monitor and actuator are paired, the additional features of the wireless monitor can be accessed. In addition to the Menu button, there are three other buttons. Using the Sensitivity button, the driver can select the system sensitivity for Low, Medium, or High (we selected High for this application). The Vehicle button selects the type of vehicle being towed (Compact, Small SUV, Large SUV or Truck), and the last button is the Brake Test button. When the Brake Test button is pushed, the actuator applies the dinghy brakes. This test should only be performed in an open area where there is no traffic and speeds are slower than 10 to 15 mph.
The wireless monitor also offers a number of helpful indicators and warnings. For example, an LCD bar display reflects the amount of braking the system is applying, and should the dinghy brakes stay applied for 15 seconds, an indicator will light, an alarm will sound and the system will disengage the brakes. They can then be reapplied using the motorhome’s brakes. The system also has a low-battery-voltage warning/alarm, and a breakaway indicator/alarm.
 “Another nice feature of the RVibrake2 is a tire-pressure-monitor system for the dinghy’s four tires. Installation is pretty straightforward; just attach the tire-pressure sensors to the correct valve stem and follow the steps on the wireless monitor.“
The tire-pressure sensors operate via Bluetooth and need to be paired to the system for the initial installation. This is accomplished by following the menu on the wireless monitor. The RVibrake2 actuator must be plugged in and operational before installing the tire-pressure sensors. Once paired, the tire pressure is displayed on the wireless monitor with the push of a button.
There are three displays for tire-pressure alerts. A Low Pressure alarm sounds if any tire falls below the set pressure (default is 25 psi); a TPS Zero Pressure lets you know if the dinghy vehicle has a flat; a High Temp Alert goes off if any tire temperature exceeds 170 degrees Fahrenheit.

Out of the gate, the smoothness of the dinghy braking was impressive. Once up to normal non-freeway speed, the brakes were applied again and the slowdown was very smooth. A hard stop at low freeway speed resulted in maximum dinghy braking without tire squealing or burning rubber. The proportional operation of the RVibrake2 is a strong confidence builder. Adjusting the Sensitivity Level control allows the driver to dial in comfortable dinghy braking effort.
It’s nice to know the RVibrake2 system will have your back when needed. At $1,150, it’s a good investment in safety and it can be moved to a new dinghy vehicle at any time.
800-815-2159 | www.rvibrake.com


Leave a comment